Scheduling Appointments Using Make Multiple
The following example illustrates how to schedule using Make Multiple.
- Begin any scheduling process by selecting the appropriate patient to schedule.
- Select and place the resources to be scheduled in a scheduling column. See, Resource Scheduling Views for a review.
- Select the appropriate date for the appointments using the calendar.
- Press Ctrl and select the appropriate time for each resource.
- Select Make Multiple from the Scheduling Palette to open the Make Multiple Appointments screen.
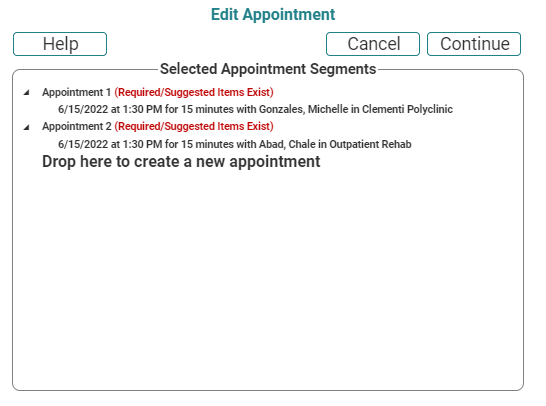
- Each resource for whom time was selected on the scheduling grid is listed as a separate, numbered Appointment in a tree list.
- Each of the appointment line items serves as a link (e.g., Appointment 1) that will launch the Edit Appointment screen for that appointment.
- Click the appointment line item you wish to edit. The Edit Appointment screen will appear.
- Make the necessary changes and click Done. You will be returned to the Make Multiple screen.
- Note that the appointment has not yet been scheduled. The appointments are not scheduled till you complete step 10.
- Repeat steps 7–8 as necessary for each appointment.
- Once you have finished with the appointment details, click Continue at the top of the Make Multiple Appointments screen. The system will check for conflicts and post the appointments.

This example shows a patient being scheduled with (shaded/selected cells) two resources.

Key Considerations
- The program provides several methods for scheduling multiple appointments for patients including:
- Copy: A quick, visual means for scheduling several appointments of the same type with the same or different resources.
- Recurring: An option on the Edit Appointment screen that takes all the guesswork out of scheduling several of the same appointments, but schedules them all for the same time and resource on different days.
- Make Multiple: A visual method that allows user to schedule multiple resources, dates and times and then lets them assign unique appointment details.
- If you apply the Recurring option to any appointment of a Make Multiple, then Recurring is automatically applied to all of the other appointments.
Regardless of the method used to schedule, you can always edit the appointment details individually after they have be scheduled.
See also, Using Make Multiple with Multisegment Appointments
