Data Search Review
All of the data search screens in WellSky Resource Manager share some common functionality so that no matter what data you are looking for, the methods for locating it will be familiar (see the Patient Search Review topic for additional information). As an example, we will look at contacts.
- Select Data Maintenance > Contact Maintenance > Contacts from the Main menu. The Edit Contact screen will appear.
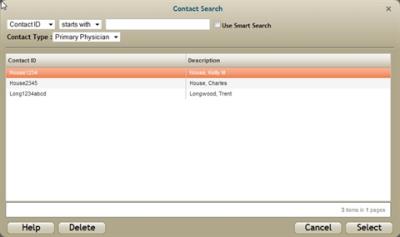
- Click the Select button. The Contact Search screen will appear.
- Use the following descriptions and definitions to navigate and locate data on a searchscreen:
- Search Criteria or Search Term: Data searches are generally configured to search on ID (or Code) and Description with the ID being the default criteria. Click the drop-down to choose and alternate term on which to search:
- Starts with: The default configuration of data search screens looks for data where the Search Criteria "starts with" whatever the user types in the Search For field. For example, in the sample database if a user searches for contacts by ID and types long, the results will appear as follows:
- Search For: The Search For field is the text field where users type the text on which they want to search. Note the highlighted field with the text long.
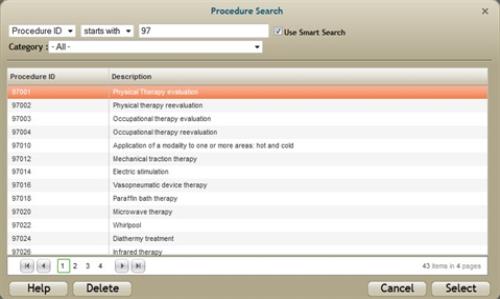
- Type or Category: Several of the data elements in WellSky Resource Manager are defined with either a type or a category to help filter data more efficiently. Use the drop-down in these fields to choose additional sort criteria. The following illustrates procedure categories, for example.
- Use Smart Search: When this option is enabled, the search utility uses some basic logic to try and determine what the user is typing, and it will automatically adjust the search criteria to re-focus the search accordingly.
- Data Search screens are prepopulated with the first 25 items of the type for which you are looking. If more than 25 results are available for any search that you perform, then some page controls and the number of items are displayed below the results list table (illustrated in the following).
- Once you have adjusted the Search Criteria and decided whether to locate matches that "start with" or "contain" the text you enter, begin typing your search text in the Search For field.
- Once the correct procedure has been located, do either of the following:
- Double-click the description
- Click the description once and then click Select.


The search screen will refresh the data according to your selection: In our example, when Description is selected the data is listed alphabetically by the contact description.

Alternatively, the user can click the drop-down and choose "contains."

Then, as he or she types in the Search For field, the list panel will refresh to show all the data that contains the characters that were entered, not just those that start with the characters.

Upon entering the search screen, the cursor automatically has context in the Search For field. So if the default search parameters meet your needs, simply enter the text for which you are searching.

For example, choose Diagnostic Imaging to have the search screen list only those procedures that have been associated with that category.
For example, if the search criteria is set to use Description and the user begins typing what is actually an ID, the search logic identifies that the text is not a description and then switch its focus to ID. If and when a match is located, (a) the search criteria will automatically switch to ID and the records that most closely match the text will appear in the list panel. Search screens retain the last used settings as the default parameters for searches.

Note that the number of
items in your search are indicated by
"x items in y pages" at
the bottom right of the form. This is illustrated in the previous screen
shot by 76
items in 4 pages. Use the single arrows ![]()
![]() to scroll through the results a page at
a time. Alternatively, click a page number to move to that page of the
result set. Use the "break" arrows
to scroll through the results a page at
a time. Alternatively, click a page number to move to that page of the
result set. Use the "break" arrows ![]()
![]() to move to the first or last page of the
current search result.
to move to the first or last page of the
current search result.
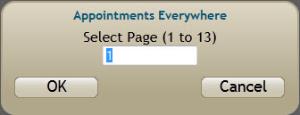
If the data you have for any one type exceeds 20 pages, an ellipses button will appear to the right of the last page number displayed. Click the ellipses button. A dialog box displays.


Type the page number you want to navigate to, and then click OK.
Take for example, a user who search procedures on IDs that begin with 97: the Search screen will refresh to look something like the following:

Then if that user continues to type so that 9702 appears in the Search For field, the results will look like

Reordering Data Columns
The search dialogs have a nice feature that allows users to arrange the columns of data to fit their current need. As an example, use the Patient Search dialog. When you change the default search term to Description, for example, you can arrange the columns in the list panel so that your search criteria is in the first position. This will make your view of any search results more efficient.
- Click-and-hold the mouse down over the column header of the criteria you want to move.
- While holding
the mouse down, drag the header to the first position. Note
that the "No" icon
 appears on the left. This
indicates the header has not been moved far enough to switch
positions.
 - Once the icon changes to a plus + icon, release the mouse. The columns will switch positions.


Use this technique with any of the Search screens to navigate and locate your desired data.
