The My Home page is what appears in context when you successfully log in to the program, and it serves as a snapshot of your appointments with the care provider. Note that your log in name appears in the banner at the top-left of the screen: e.g., Welcome Anyan Barghest in the example screen shot below.
Use the following descriptions and definitions to navigate the page.
The Main menu consists of a series of screen tabs that appears in the banner at the top of the Portal screens. Simply click a description to navigate to that page.
My Home (current page): Click this link to return to the home page.
Make an Appointment: Click this option to schedule an appointment.
A patient's ability to schedule their own appointments depends on how the care provider has configured the Portal. If this link does not appear, then either you don't have an active case or your provider only allows appointment requests. If it does appear, review the Help provided on the Make Appointment screen for instructions about how to proceed.
Request an Appointment: Click this link to request an appointment.
Account Maintenance: Click here to change your password, user name, contact information, or log in questions.
Help: Click this option to pull any Help that has been provided for the current screen. Alternatively, navigate the content of the Help using the Contents.
Logout: Click this link to exit the Patient Portal.
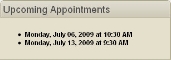
This panel lists any future appointments that you have currently scheduled. Appointments are listed in day, date, and time format.
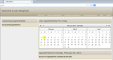
This panel is composed of a 3-month calendar that shows the current month and the two following months.
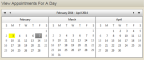
The Appointment Details panel lists specific information about the appointments that are scheduled for the selected day. Click any date on the calendar to display any appointments that might have been scheduled for that date. Change calendar views by clicking the single and double arrows along the top of the calendar. The single arrows advance the calendar in three-month intervals.
You have no appointments scheduled for this date


If you have configured your display to do so, any procedures that have been scheduled for the appointments will be displayed in a bulleted list beneath the details of the appointment. See the account maintenance topic for a discussion.
In addition to the appointment details, the Download Reminder option also appears on dates that have appointments. To create a reminder,

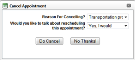
The ability to cancel appointments depends on how the care provider has configured their portal. They must provide cancellation reasons if they want users to be able to cancel their own appointments. If you find that you do not have this ability, it is because this care provider has not provided it. Consequently, you need to contact the provider directly to cancel the appointment. If you see the Cancel This Appointment link and need to cancel your appointment,
The calendar will refresh to show the appointment was removed, but you may have to click the Refresh button on your browser to clear the appointment from your Upcoming Appointments panel.
Copyright © 2014 Mediware® Information Systems, Inc.