Scheduling Block Times
To create a block time on the grid:
- Ensure that the resource for whom you would like to schedule the block time is placed in a column.
- Navigate to the appropriate date using the Calendar.
- Select the appropriate time on the grid then right-click and select Block from the Scheduling Palette.
- Complete the following fields on the New Block Time screen according to the following descriptions/definitions.
- Daily
- Weekly
- Bi-Weekly
- Monthly
- Enter a date range in the Start and End dates for the block and make the appropriate day selections (e.g., Daily, or MTWTHF).
- Enter a Start Date and the Exact Number of appointments authorized for this block time.
- Click Continue. The program will check for conflicts and post the block times. If conflicts are detected, the Resolve Conflicts screen will appear. Conflicts are resolved according to individual scheduling rights and workflow preferences of the organization.
Block Time Reason: Click Select to display the Reason Search dialog and choose a reason appropriate for the current block. A reason is required.
Color: Choose a color appropriate to the block time. The default color is gray, but this may have been changed by the system administrator. Follow whatever business rules your organization has established. You can accept the default color, or click the Color Cube and select a different color.
Scheduling Details: This panel displays the resource for whom the block is being scheduled, the start date, the start time, domain (where appropriate), and the initial duration for the block. Use the spinner controls if necessary to modify the duration.
Recurring Panel: Use the drop-down to choose from several options for creating a block that recurs over time. If appropriate click the drop-down menu and choose from the following:
Additional options will appear in the Recurring panel depending on the option selected. For example, the Daily option requires a choice between (a) Every Work Day and (b) Every Day. The Weekly option provides a list of the weekdays from which you specify the days on which the block occurs. You can do one of the following:
Comments: Use the space provided in Comments to enter any information regarding the block time that might be informative or required. Examples include instructions about what to bring to a staff meeting or instructions that list exceptions for overriding a block time to schedule a patient appointment.
The program will perform normal conflict checking and the block time will be displayed for the day/time selected. The description of a block time will be the reason selected, which will display in the first cell of the appointment.
Key Considerations
- To schedule block times over existing appointments in a patient column, you must have the folowing rights in all of the domains in which the appointment over which you are booking the block is scheduled:
- Block Operations > Add Block
- Conflict Operations > Double Book Block Times
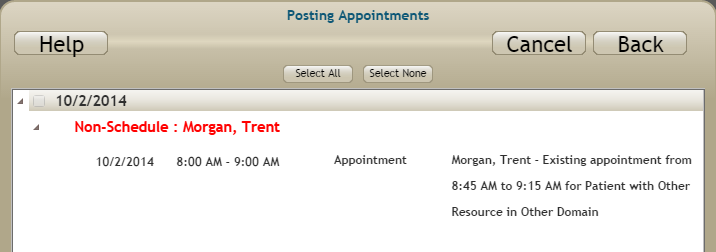
Otherwise, a conflict similar to the following will appear:

