Edit Resource Shift Schedule
Shift schedules are used to define resource work schedules as they vary from the normal hours of operation. They work by explicitly indicating Here (available to schedule) or Not Here (unavailable) times. Similar to the Edit Resource Template, the Edit Resource Shift Schedule option appears on the right-click menu of a resource column as an alternative workflow to that offered in Data Maintenance.
To begin:
- Navigate to the grid and locate the resource-domain column assignment you wish to edit. If necessary, place the resource into a column.
- Right-click over the column header to display the menu, and then select Templates and Shift Schedules > Edit Resource Shift Schedule.
- Enter the template parameters according to the following descriptions and definitions.

The Resource Shift Schedule screen will appear.
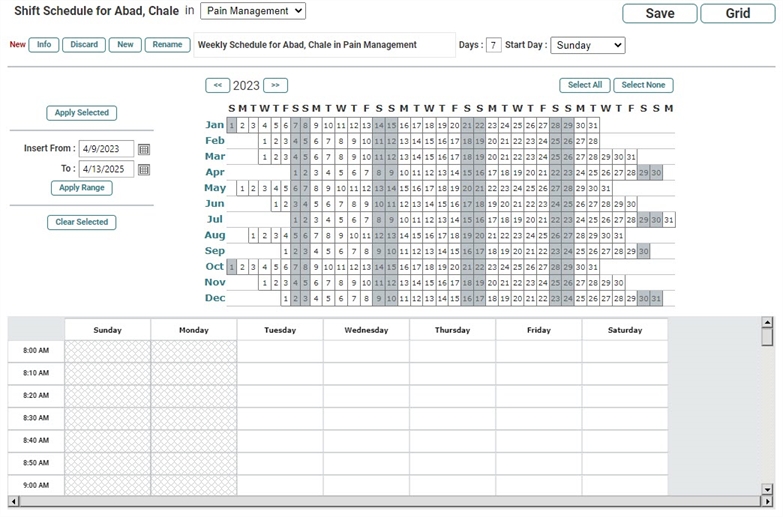
Schedule Description and Cycle Controls
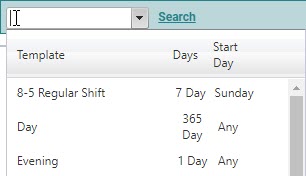
- Click the description once to display the search field.
- Click the description once to display the search field and then click the Search link. The Shift Schedule Search screen will appear. Navigate the screen and select the desired item as you would in any standard search dialog.
Shift Schedule for [resource last name, first name] in [domain]: The resource-domain combination will automatically populate with the information from the column on which you clicked. Change the domain as needed. If, however, the resource is incorrect, you must exit and restart.

When the Resource Shift Schedule screen first appears, WellSky Resource Manager populates the shift schedule detail parameters with the information for the schedule that the resource most commonly uses. If a resource has never used shift schedules, then the program uses a generic description with "Weekly schedule for [resource last name, first name]" and then populate the day parameters with the typical values.
Info: Click the Info button to determine whether any other domain or resource is using the template and will be affected by your intended modifications. An example message is illustrated in the following screen shot.

The template and shift schedule Info screens are identical except for the schedule nomenclature.
Discard: Use this option to clear any changes you have made to the current schedule.
New: Use this option to create a new schedule. The description and day parameters will default to generic values. Change these as needed.
Rename: Use this option to change the description.
Description: Do one of the following to select an alternative schedule:

Begin typing the description of the desired template. The templates that most closely match what you have typed will appear in a drop-down list. Simply click the one that you want to use. Note that if you double-click the description, a list of all the templates in the database (domain) will drop down.
Days: Enter the number of days on which the schedule cycle should repeat. The default is 7 days, or a standard week. Generally, choose multiples of 7 up to 28 days.
Start Day: Choose the starting day for the schedule. The default is Sunday (a standard 7 day work week is counted as Sunday to Saturday). The options also include (any) for any day of the week.
Shift Schedule Assignment
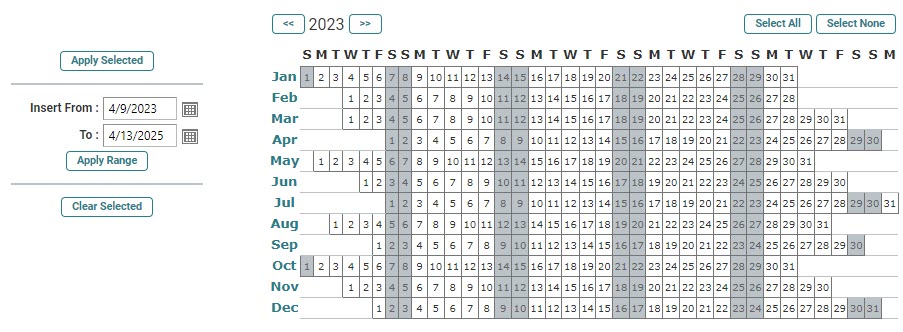
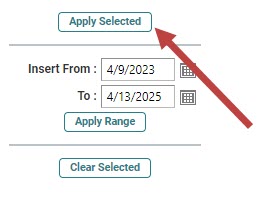
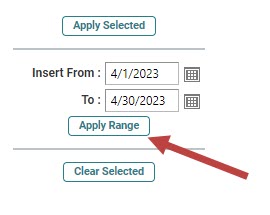
Once the appropriate schedule has been selected, you (a) simply select the days on which to apply the schedule and then (b) click the Apply Selected button. As an alternative, you can apply the schedule to date range using the Insert fields.
For example, to apply the "8-5 Regular Shift" schedule to April:
- Click-and-drag across all of the days of April in the calendar, illustrated in the following screen shot.
- Click the Apply Selected button.
- Repeat steps 1–2 until the shift schedule has been applied to the necessary days.

Alternatively, click the month description (Apr in this example) to select the entire month.
The calendar will refresh and display the newly applied schedule in a color block (the color varies on the number of templates in the calendar). If you hover the cursor over any portion of the schedule, a tooltip will provide the description.

Use the Alt key while clicking over an assigned schedule to select it. As an example you may be editing a resource that has two or three different schedules in a calendar year and want to modify or apply one of them to a different date range. Alt + click over any portion of the schedule to place it in context and then apply your changes.
Use the calendar controls according to the following as needed:
Clear Selected: Use this option to remove a template from the days that have been selected on the calendar. This is basically a reverse assignment: that is, you select the days for which the template should be cleared on the calendar and then click Clear.
Insert From/To: Use the date fields to establish a date range for which to apply a template. Use the dates in lieu of painting the days on the grid. Then click Apply Range below the date range to apply the selected template.
Arrow Controls: Click the left and right double-arrows bounding the year to move the year forward or backward.

Select All: Use this option (above the calendar) to quickly select the entire year.
Select None: Click this option to clear your current selection on the calendar.
Creating and Editing Shift Schedules
Use the grid in the lower half of the screen to create and edit shift schedules.

For example:
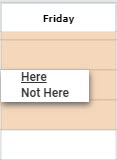
- Select the time or times on the grid corresponding to the time you want to designate as Here or Not Here.
- Right-click over any portion of the selected time. A pop-up menu will appear.
- Click either selection depending on your current need.
- Repeat as necessary to complete the elements of the shift schedule.
- Once you have finished, click Save at the top of the screen. The screen will refresh and commit your changes.
- Create or apply a new template, and then click Grid to return to the scheduling grid once you have finished modifying the resource's schedule.
Here
Not Here
Notes about Time Selection on the Grid
Some significant quick key features have been added to these grids to enhance the users ability to select time. Use the following examples as a quick overview.
- The right-click menu off the column headers provides two options for selecting an entire day:
- Right-click on Monday and choose the Select Entire Day option to highlight all of the time slots for Monday.
- Right-click on Wednesday and choose the Select Entire Day (inclusive) option to select it as well.
- Right-click on any of the selected times and choose either
- Complete and save the schedule.
- To select specific time slots over several days, use the standard Windows feature of Ctrl + click. For example,
- Select time in which you want to place a hold on Monday.
- Press and hold the Ctrl key down and select additional time over the rest of the schedule work week. You can click-and-drag over the desired time or click individual time slots.
- Right-click any of the selected time slots and choose either
- Complete the Reason screen as necessary.
- Complete and save the shift schedule.
- To clear items from the grid (block, hold, Not Here time),
- Right-click over the item you wish to clear (alternatively, use Ctrl + click to select multiple items) to display the menu.
- Select Clear All Selected Block/Holds or the Clear All Selected Cells option according to your need. The grid will refresh to clear the items.
- Proceed with modifying the template or shift schedule as you would normally.
Select Entire Day
Select Entire Day (inclusive)
The first option is a straightforward option to select an entire day to set blocks and holds. The second option allows uses to select additional days without losing context of the previous selections (i.e., the user isn't required to hold the Ctrl key down to select additional time). For example,
Here
Not Here
Alternatively, you could select just a portion of one day and then right-click over a column header of another day to use the "inclusive" option to select that entire day as well. Note that Shift + click is still a valid option for selecting large chunks of time.
Here
Not Here
Keep in mind that whenever you aren't selecting an entire day from the column menu, you need to Ctrl + click to maintain the context of the previous selected items.
Keep in mind this is the only method you have for clearing away items you applied in error or no longer require.
